カテゴリー: PC

  • DTIサーバー構築31 「どなたですかな!」

    いつものことながら、自宅サーバー(ちっこいノートPC)が不調ですが、何もできてない。
    さて、新たなレンタルサーバーもメール受信できないという状況になっている。
    で、心当たりのあるメールを掘り出してきて確認。

    1月20日 17:30~20:30 27.120.95.129~27.120.95.250 2001:2e8:65c:0:2:1:0:1~
    2001:2e8:65c:0:2:1:0:1f4

    どう考えてもこの時間帯からおかしい。

    本メンテナンスにより、/sbin/iptables saveコマンドが正常に動作しなくなります。対処として、yum install policycoreutilsコマンドを実施しpolicycoreutilsをインストールしてください。メンテナンス前に実施しても問題ありません。
    うん。文面見ても、どう考えても、これが原因。
    も〜、や!

    P.S.
    その後、ただ単に「dovecotが自動起動に設定されていなかっただけ」というアホな原因が発覚。
    も〜、や!

  • DTIサーバー構築30 「私のもの」

    MySQLをインストール。

    $ sudo yum -y install mysql-server
     :
    Installed:
      mysql-server.x86_64 0:5.1.69-1.el6_4                                                                    
    Dependency Installed:
      mysql.x86_64 0:5.1.69-1.el6_4     perl-DBD-MySQL.x86_64 0:4.013-3.el6     perl-DBI.x86_64 0:1.609-4.el6  
    Complete!
    続いて設定ファイルの編集。

    $ sudo vi /etc/my.cnf
    文字エンコーディングの変更。

    [mysqld]
    skip-character-set-client-handshake
    character-set-server=utf8
    [mysql]
    default-character-set=utf8
    起動!

    $ sudo service mysqld start
    自動起動の設定!

    $ sudo chkconfig mysqld on
    これでMySQLサーバーは起動して準備OK。

    とりあえず、ユーザーとパスワードを設定しておく。

    $ mysql -u root
    MySQLの全ユーザー@ホスト、パスワードを表示。

    mysql> SELECT user, host, password  FROM mysql.user;
    +——+—————–+———-+
    | user | host            | password |
    +——+—————–+———-+
    | root | localhost       |          |
    | root | example.com |          |
    | root | 127.0.0.1       |          |
    |      | localhost       |          |
    |      | example.com |          |
    +——+—————–+———-+
    5 rows in set (0.01 sec)
    ユーザー名がないときは拒否するために、削除。

    mysql> DELETE FROM mysql.user WHERE user=”;
    Query OK, 2 rows affected (0.00 sec)
    確認

    mysql> SELECT user, host, password  FROM mysql.user;
    +——+—————–+———-+
    | user | host            | password |
    +——+—————–+———-+
    | root | localhost       |          |
    | root | example.com |          |
    | root | 127.0.0.1       |          |
    +——+—————–+———-+
    3 rows in set (0.00 sec)
    パスワードが入っていないので、設定。

    mysql> SET PASSWORD FOR root@localhost=password(‘Pass-for-root’);
    Query OK, 0 rows affected (0.00 sec)
    確認。

    mysql> SELECT user, host, password  FROM mysql.user;
    +——+—————–+——————————————-+
    | user | host            | password                                  |
    +——+—————–+——————————————-+
    | root | localhost       | *fhjtugkfirueidkfjgutiyigjfhrutyfhdjfuryt |
    | root | example.com |                                           |
    | root | 127.0.0.1       |                                           |
    +——+—————–+——————————————-+
    3 rows in set (0.00 sec)
    あと、2回。ユーザー自体を消してもOKだけど。

    mysql> SET PASSWORD FOR root@’example.com’=password(‘Pass-for-root’);
    Query OK, 0 rows affected (0.00 sec)

    mysql> SET PASSWORD FOR root@127.0.0.1=password(‘Pass-for-root’);
    Query OK, 0 rows affected (0.00 sec)
    再度確認。

    mysql> SELECT user, host, password  FROM mysql.user;
    +——+—————–+——————————————-+
    | user | host            | password                                  |
    +——+—————–+——————————————-+
    | root | localhost       | *fhjtugkfirueidkfjgutiyigjfhrutyfhdjfuryt |
    | root | example.com | *fhjtugkfirueidkfjgutiyigjfhrutyfhdjfuryt |
    | root | 127.0.0.1       | *fhjtugkfirueidkfjgutiyigjfhrutyfhdjfuryt |
    +——+—————–+——————————————-+
    3 rows in set (0.00 sec)
    とりあえず、ユーザーの設定は完了。

    次に、データベースの一覧を表示

    mysql> SHOW DATABASES;
    +——————–+
    | Database           |
    +——————–+
    | information_schema |
    | mysql              |
    | test               |
    +——————–+
    3 rows in set (0.00 sec)
    テスト用のデータベースを削除。

    mysql> DROP DATABASE test;
    Query OK, 0 rows affected (0.00 sec)
    終了。

    mysql> quit
    Bye
    再度入るときは、今設定したパスワードが必要。

    $ mysql -u root -p
    Enter password: 入力すると入れる。

    あとは、適当に。

  • DTIサーバー構築29 「B・K・B?」

    DTIサーバー構築29 「B・K・B?」

    LAMPとは、Linux+Apache+MySQL+PHP(,Perl,Python)のこと。
    まずはPHPをインストール。

    $ sudo yum -y install php php-mysql php-mbstring
     :
    Installed:
      php.x86_64 0:5.3.3-23.el6_4           php-mbstring.x86_64 0:5.3.3-23.el6_4  
      php-mysql.x86_64 0:5.3.3-23.el6_4  
    Dependency Installed:
      php-cli.x86_64 0:5.3.3-23.el6_4       php-common.x86_64 0:5.3.3-23.el6_4    
      php-pdo.x86_64 0:5.3.3-23.el6_4    
    Complete!

    これだけ、後はApacheの再起動。

    $ sudo service httpd restart
    httpd を停止中:                                            [  OK  ]
    httpd を起動中:                                            [  OK  ]
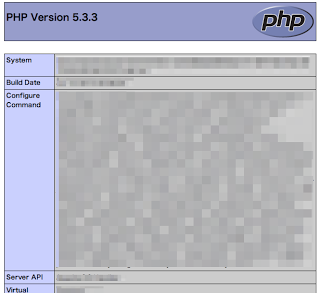
    次の1行のみのファイルを、/var/www/html/test.phpとしてファイル転送。

    ブラウザで次のURLを開く。

    http://yourdomain.com/test.php
    なんだかんだ次のような表示がされればOK

    test.php
    test.php

    ちょこっとPHPの設定を変更。

    $ sudo vi /etc/php.ini
    <?と?>タグでPHPが実行できるように。

    #short_open_tag = Off
    short_open_tag = On

    PHPの情報が表示されないように。

    #expose_php = On
    expose_php = Off

    標準文字エンコーディングの指定。

    default_charset = “UTF-8”

    タイムゾーンの指定。

    date.timezone = Asia/Tokyo

    マルチバイト文字の扱いを設定

    mbstring.language = Japanese
    mbstring.internal_encoding = UTF-8
    mbstring.http_input = UTF-8
    mbstring.http_output = pass
    mbstring.encoding_translation = On
    mbstring.detect_order = auto
    mbstring.substitute_character = none;

    編集が終わったら、再び再起動。

    $ sudo service httpd restart
    httpd を停止中:                                            [  OK  ]
    httpd を起動中:                                            [  OK  ]

    次はMySQLだな。

  • DTIサーバー構築28 「みんな見て!」

    メールサーバーの構築が大体出来たので、WEBサーバーの設定を行っていく。
    といっても、SSLの設定は既にやったので、その他の基本的な部分。

    Apacheのバージョンが1から2になったのは、もう何年も前。
    昔はApache2と、2を強調しないといけなかったが、最近は、Apacheといえばバージョン2の事。

    まずは、基本設定ファイルの編集。

    $ sudo vi /etc/httpd/conf/httpd.conf
    サーバーのOSを隠して、ソフト名だけを伝える。

    #ServerTokens OS
    ServerTokens Prod
    接続状態の確認機能をON。

    #KeepAlive Off
    KeepAlive On

    サーバーの管理者メールを変更。

    #ServerAdmin root@localhost
    ServerAdmin webmaster@yourdomain.dom
    サーバー名を変更。
    ただし、VirtualHost機能を使うときは、コメントのままに。

    ServerName yourdomain.com:80
    フォルダのインデックス表示は、やめておく。

        :
    #    Options Indexes FollowSymLinks
        Options FollowSymlinks
        :
    ログのIPをDNSでホスト名に変換する。でも、処理が重いのでOffでいいかも。

    #HostnameLookups Off
    HostnameLookups On
    NotFoundなどのページにサーバー名を入れないように。

    #ServerSignature On
    ServerSignature Off
    アイコンフォルダもインデックス表示なしに。

    #    Options Indexes MultiViews FollowSymLinks
        Options MultiViews FollowSymLinks
        :

    日本語の優先度を上げる。

    #LanguagePriority en ca cs da de el eo es et fr he hr it ja ko ltz nl nn no pl pt pt-BR ru sv zh-CN zh-TW
    LanguagePriority ja en ca cs da de el eo es et fr he hr it ko ltz nl nn no pl pt pt-BR ru sv zh-CN zh-TW

    あと、余計な設定を読み込まないように改名。

    $ sudo mv -i /etc/httpd/conf.d/welcome.conf /etc/httpd/conf.d/welcome.conf.org
     とりあえず。

  • DTIサーバー構築27 「コソコソ」

    Postfixで、SASLを使おう。
    SASLとは、
    http://www.ipa.go.jp/security/rfc/RFC2222JA.html
    文章だけでは理解するのに一苦労。

    まず、Postfixがdovecotを使ったSASLに対応しているかを確認。

    $ postconf -a
    cyrus
    dovecot
    postconfのマニュアルを一部コピっとく。

           -a     List  the available SASL server plug-in types.  The SASL plug-in
                  type is selected with the smtpd_sasl_type configuration  parame-
                  ter by specifying one of the names listed below.
                  cyrus  This  server  plug-in  is available when Postfix is built
                         with Cyrus SASL support.
                  dovecot
                         This  server  plug-in  uses  the  Dovecot  authentication
                         server,  and  is available when Postfix is built with any
                         form of SASL support.
                  This feature is available with Postfix 2.3 and later.

    ということで、dovecotが表示されたので、対応可能ということで。

    Dovecot SASLを使う場合は、Cyrus-SASLを停止させて問題ない。

    $ sudo service saslauthd stop
    saslauthd を停止中:                                        [  OK  ]
    自動起動もしないように変更。

    $ sudo chkconfig saslauthd off

    Postfixの設定に追記して、SASLを可能に変更。

    $ sudo vi /etc/postfix/main.cf
    以下を追加する。

    smtpd_sasl_auth_enable = yes
    smtpd_sasl_authenticated_header = no
    smtpd_sasl_type = dovecot
    smtpd_sasl_path = private/auth
    smtpd_sasl_security_options = noanonymous
    smtpd_recipient_restrictions =
        permit_mynetworks, permit_sasl_authenticated, reject_unauth_destination

    broken_sasl_auth_clients = no
     broken_sasl_auth_clients

    broken_sasl_auth_clients (デフォルト: no)
    古いバージョンの AUTH コマンド (RFC 2554) を実装した SMTP クライアントとの相互運用性を有効にします。このようなクライアントには MicroSoft Outlook Express バージョン 4 や MicroSoft Exchange バージョン 5.0 といった例があります。
    標準的でない方法の AUTH サポートを Postfix に案内させるには、 “broken_sasl_auth_clients = yes” を指定します。

    SASLとは関係ないが、セキュリティ上、以下の設定も追加。

    disable_vrfy_command = yes
    smtpd_helo_required = yes

    次に、Dovecot側の設定を変更。

    $ sudo vi /etc/dovecot/conf.d/10-master.conf
    unix_listener部分を変更。

    service auth {
      # auth_socket_path points to this userdb socket by default. It’s typically
      # used by dovecot-lda, doveadm, possibly imap process, etc. Its default
      # permissions make it readable only by root, but you may need to relax these
      # permissions. Users that have access to this socket are able to get a list
      # of all usernames and get results of everyone’s userdb lookups.
      unix_listener auth-userdb {
        #mode = 0600
        #user =
        #group =
      }
      # Postfix smtp-auth
      unix_listener /var/spool/postfix/private/auth {
        mode = 0666
        user = postfix
        group = postfix
      }
      # Auth process is run as this user.
      #user = $default_internal_user
    }

    続いて以下のファイルも編集。

    $ sudo vi /etc/postfix/master.cf

    コメントを外す!

    submission inet n       –       n       –       –       smtpd
    #  -o smtpd_tls_security_level=encrypt
      -o smtpd_sasl_auth_enable=yes
      -o smtpd_client_restrictions=permit_sasl_authenticated,reject
    #  -o milter_macro_daemon_name=ORIGINATING
    smtps     inet  n       –       n       –       –       smtpd
      -o smtpd_tls_wrappermode=yes
      -o smtpd_sasl_auth_enable=yes
      -o smtpd_client_restrictions=permit_sasl_authenticated,reject
    #  -o milter_macro_daemon_name=ORIGINATING

    最後に、サーバーを再起動。

    $ sudo service dovecot restart
    Dovecot Imap を停止中:                                     [  OK  ]
    Dovecot Imap を起動中:                                     [  OK  ]
    $ sudo service postfix restart
    postfix を停止中:                                          [  OK  ]
    postfix を起動中:                                          [  OK  ]
    次は、STLかな。