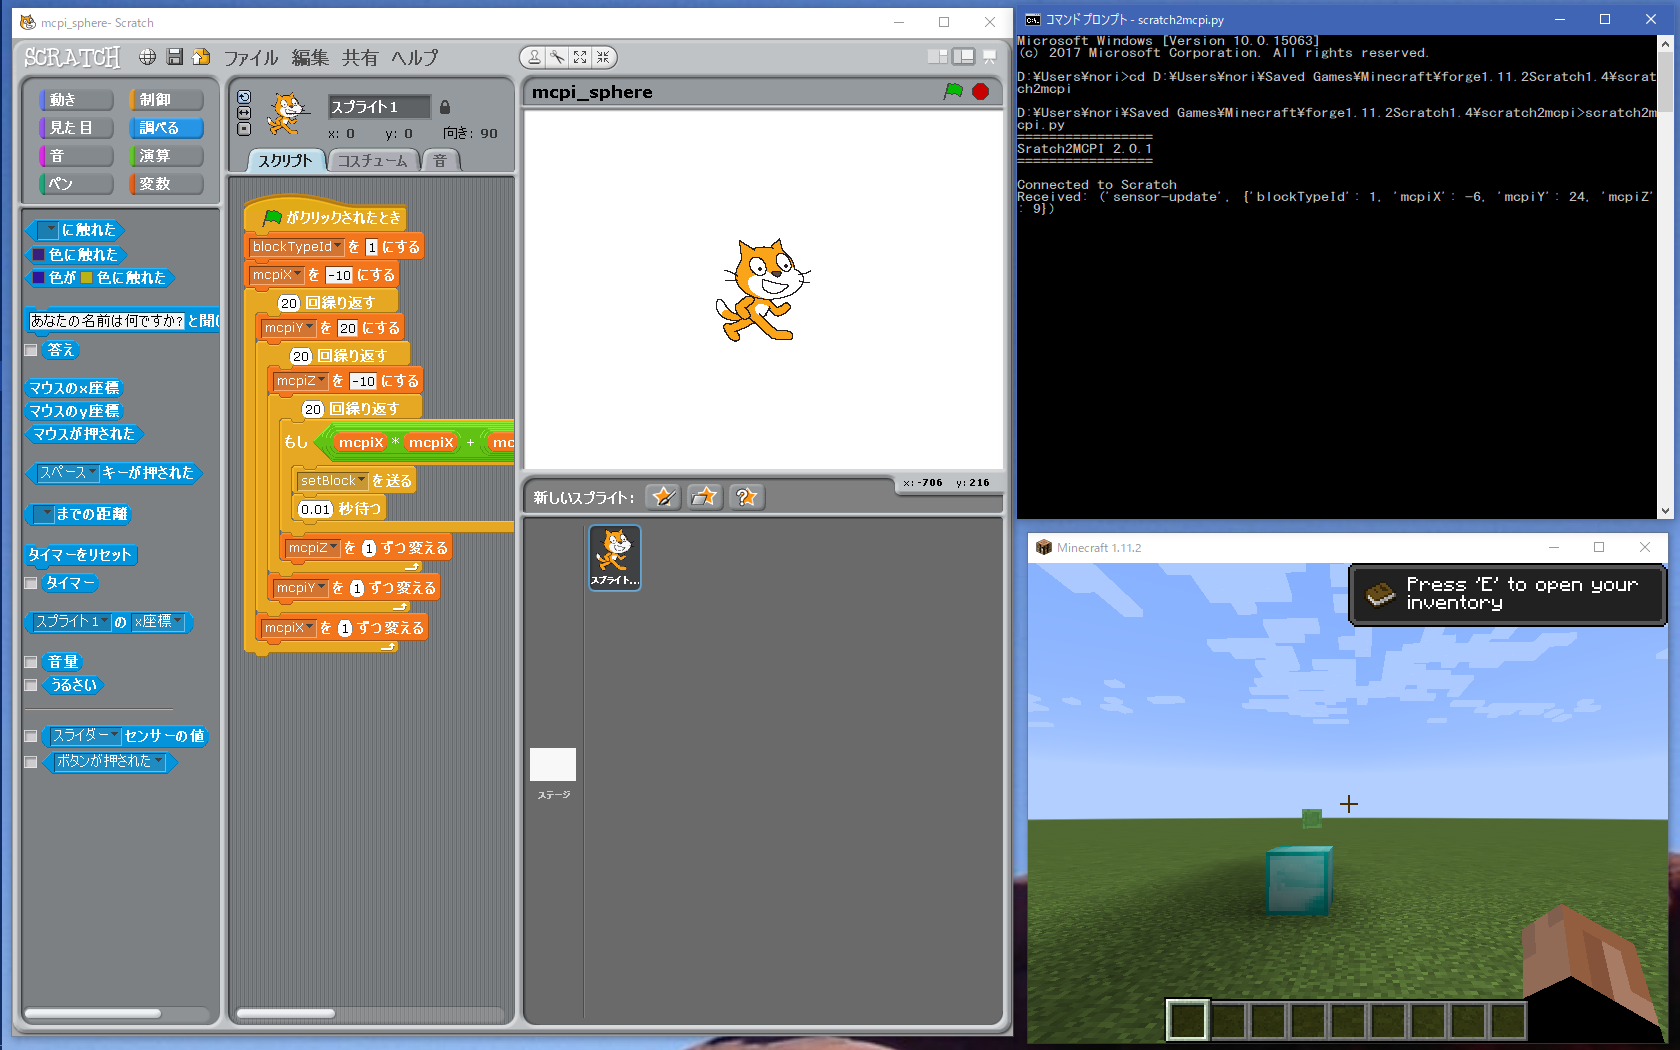
MinecraftをPythonで制御できるようになった。
ブロックを置きまくって遊んだ後は、マイクラの世界をスキャンしてみよう。そしてその情報を描画してみたい。
まずはブロックデータの取得。
posPlayer = mc.player.getPos()
for iGetX in range(int(posPlayer.x-iWidth), int(posPlayer.x+iWidth+1)):
for iGetY in range(int(posPlayer.y-iWidth), int(posPlayer.y+iWidth+1)):
for iGetZ in range(int(posPlayer.z-iWidth), int(posPlayer.z+iWidth+1)):
print(“Scan : %d, %d, %d = %d” % (iGetX, iGetY, iGetZ, mc.getBlock(iGetX,iGetY,iGetZ)))
とりあえず、こんな感じで自分の周りのブロックの情報を取得してみた。Python初心者なので、おもいっきり冗長なコードだが、気にしない。
出力は以下のようになった。
Scan : -7, -5, -22 = 12
Scan : -7, -5, -21 = 12
Scan : -7, -5, -20 = 12
:
Scan : 2, 5, -14 = 0
Scan : 2, 5, -13 = 0
Scan : 2, 5, -12 = 0
では、0でない座標に球を置いて描画してみたい。
まずは、Python3.6で描画機能を使いたいので、VPythonなるものをインストール。
> pip install vpython
初回実行時、次のようなエラーが表示されたが、再度事項してみると、エラーなく終了した。
NameError: free variable ‘install_kernel_spec’ referenced before assignment in enclosing scope
原因不明。そのうち解析したい。したいがするかどうかは別の話。
では、描画するコードを追加してみる。
import mcpi.minecraft as minecraft
import mcpi.block as block
from vpython import *
mc = minecraft.Minecraft()
iWidth = 200
posPlayer = mc.player.getPos()
arrow(pos=vector(posPlayer.x,posPlayer.y,posPlayer.z), axis=vector(iWidth,0,0), color=vector(1,0,0), shaftwidth=5)
arrow(pos=vector(posPlayer.x,posPlayer.y,posPlayer.z), axis=vector(0,iWidth,0), color=vector(0,1,0), shaftwidth=5)
arrow(pos=vector(posPlayer.x,posPlayer.y,posPlayer.z), axis=vector(0,0,iWidth), color=vector(0,0,1), shaftwidth=5)
for iGetX in range(int(posPlayer.x-iWidth), int(posPlayer.x+iWidth+1), 5):
for iGetY in range(int(posPlayer.y-10), int(posPlayer.y+iWidth+10), 5):
for iGetZ in range(int(posPlayer.z-iWidth), int(posPlayer.z+iWidth+1), 5):
idBlock = mc.getBlock(iGetX,iGetY,iGetZ)
if idBlock != 0:
print(“Scan : %d, %d, %d = %d” % (iGetX, iGetY, iGetZ, idBlock))
colBlock = minecraft.Block(idBlock).getRGBA()
vpython.sphere(pos=vector(iGetX, iGetY, iGetZ), radius=2, color=vector(colBlock[0]/255,colBlock[1]/255,colBlock[2]/255), opacity=colBlock[3]/255)
で、細かい説明が面倒になったので、描画された結果がこちら↓
OSError: [WinError 10055] システムのバッファー領域が不足しているか、またはキューがいっぱいなため、ソケット操作を実行できませんでした。
。。。
えぇ、もうパソコンが追いつかない。
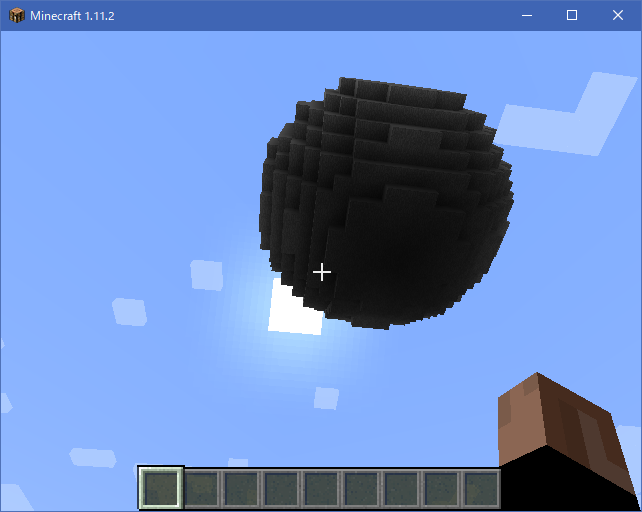
でも、なんとか描画できた結果がこちら↓
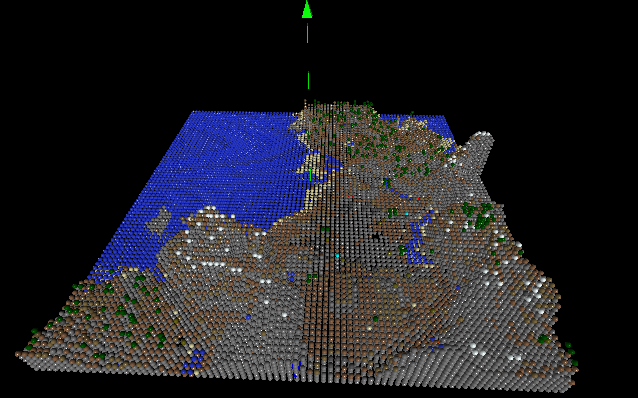
綺麗だな。でも遅いな。実用的な物になるのかな?
ソースコードも置いておこうか。BLOGに載せるとインデントがなくなってるみたいだし。